Here are the instructions for the PU-8 board.
100X
Step 1:
Turn over the playstation and remove the 6
screws from the base.
Turn the system back over and remove the top cover.
Step 2:
Removal of the cables and laser housing unit:
Step 3:
Remove the cable from the controller/memory card housing. Remove the controller/memory housing unit. Now remove the 5 screws from the main bracket.
Step 4:
Remove the four screws.
Remove the circuit board and now it's time to fit the modchip.
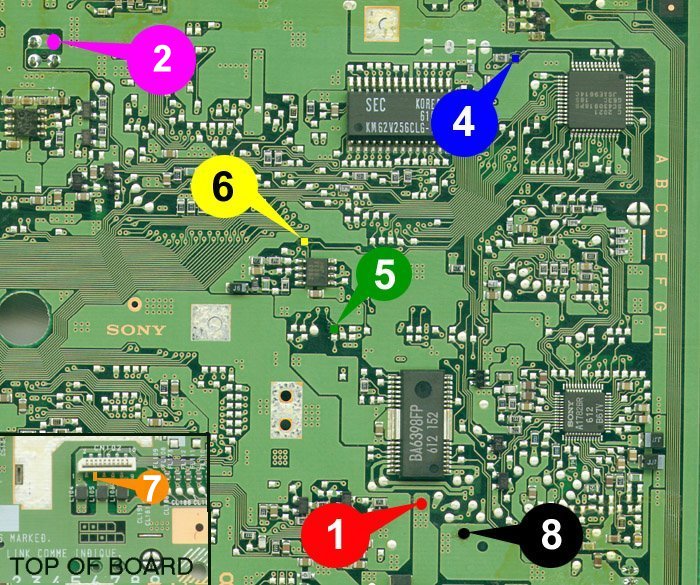
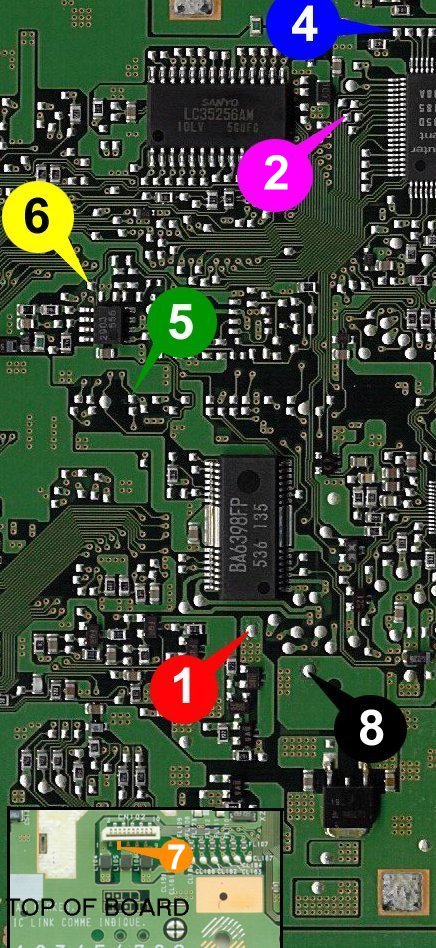
Now flip your circuit board over and look at
the circuit board diagram below to determine the part of the diagram that the figure
corresponds to. Now... There are 7 points to solder your wires.
NOTE: Pin 7 of Stealth Modchip connects to
the memory card/joypad connector on the top of the board.
Below is a picture of what you should be looking for :-
52 PIN - PU8 Board
80 PIN - PU8 Board
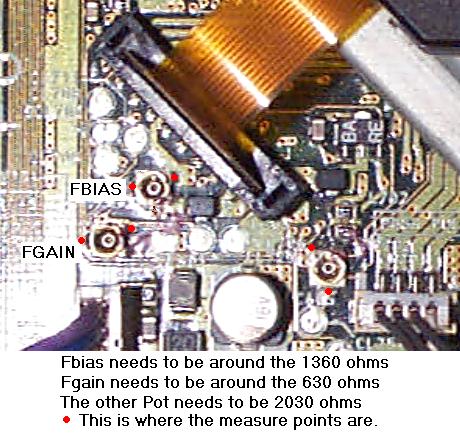
A lot of the older SCPH100x (PU8) machines sometimes require the laser to be calibrated as the FMV sometimes starts to skip. Here is a diagram to fix this problem.