Step 1:
Turn over the playstation and remove the 6
screws from the base.
Turn the system back over and remove the top cover.
Step 2:
Removal of the cables and laser housing unit:
- Remove the connectors. There are four of them in total.
- Remove the copper coloured connector.
- After the connections have been removed. Lift off the laser housing unit.
Step 3:
Remove the Metal Bracket
Remove the four screws from the metal bracket. Now remove the metal bracket this will expose the circuit board.
Step 4:
Remove the four screws.
Remove the circuit board and now it's time to fit the modchip.
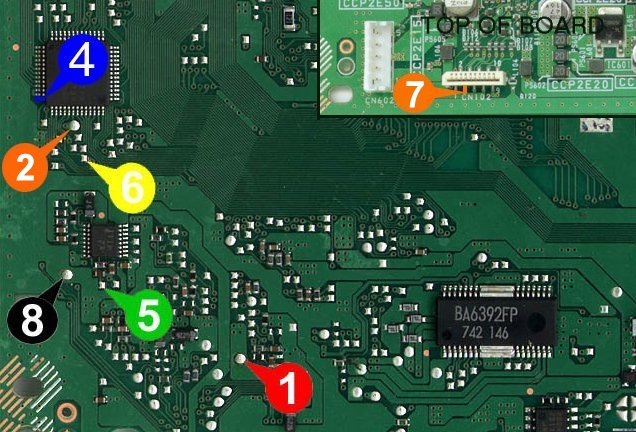
Now flip your circuit board over and look at
the circuit board diagram below to determine the part of the diagram that the figure
corresponds to. Now... There are 7 points to solder your wires.
NOTE: Pin 7 of Stealth Modchip connects to
the memory card/joypad connector on the top of the board.
Below is a picture of what you should be looking for :-